CHROMATIK

INTRODUCTION

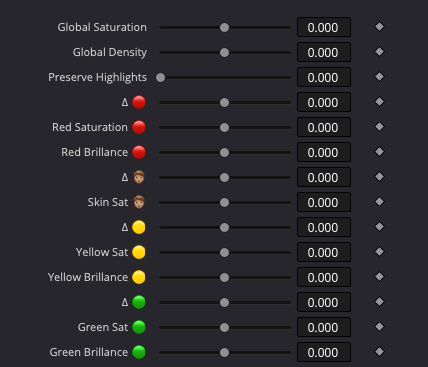
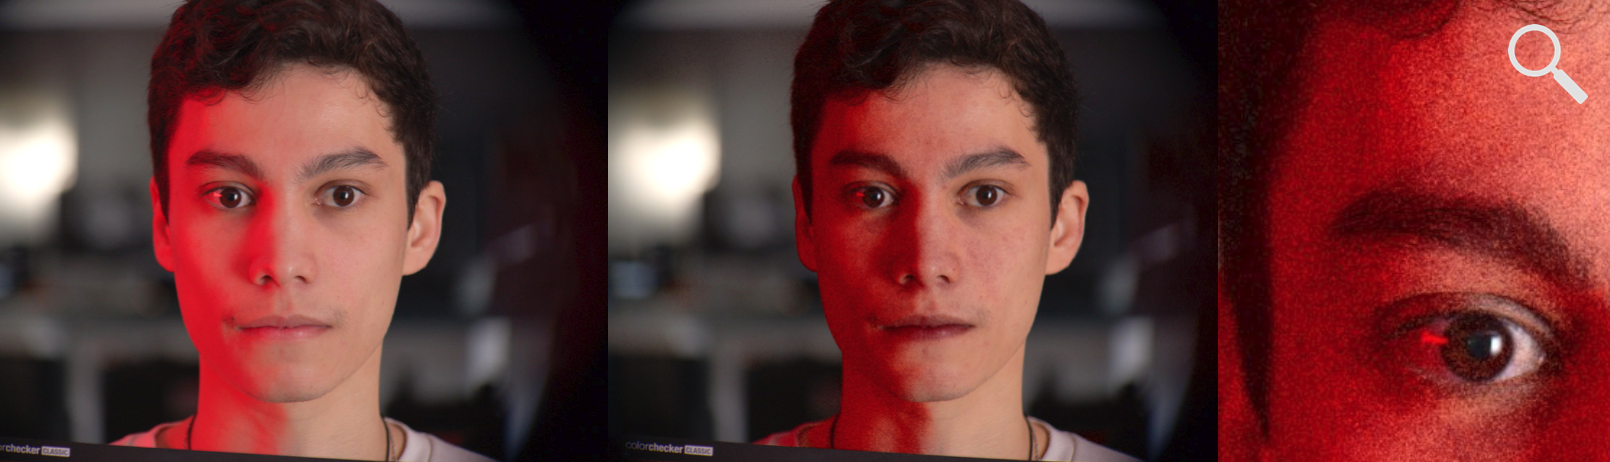
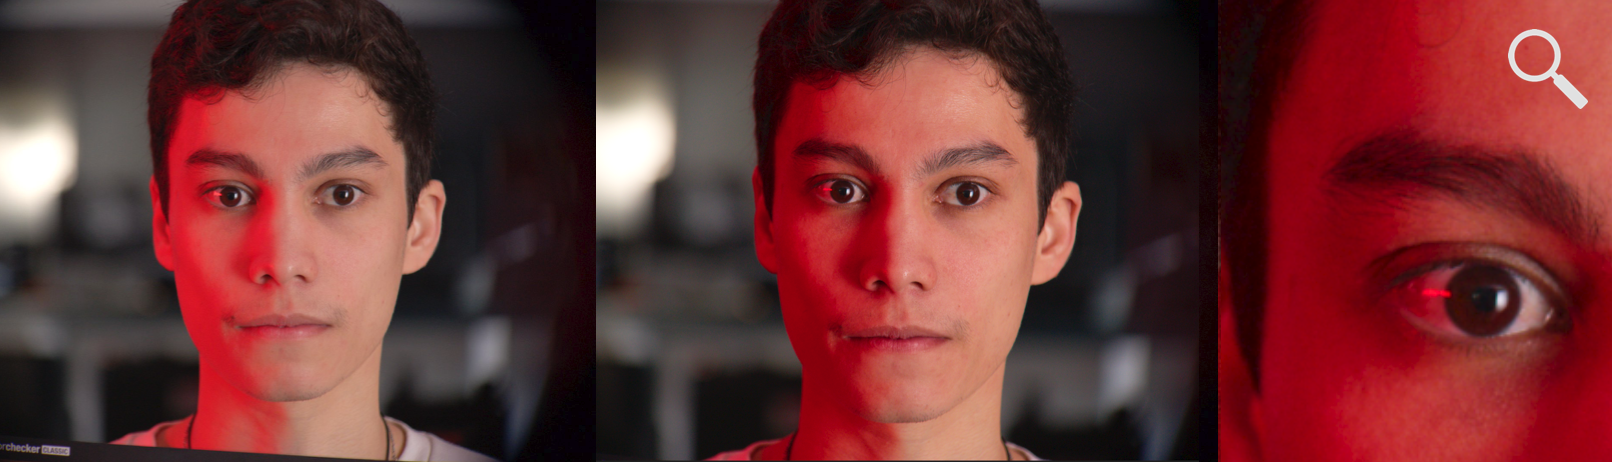
The Chromatik DCTL provides advanced control over an image’s color palette. It allows you to isolate colors based on their hue and independently adjust their brilliance (density), saturation, and even shift them toward neighboring hues.

Based on a robust mathematical model, it allows much finer and more controlled adjustments compared to Resolve’s color tools. This results in more accurate and nuanced color manipulation.

HUE SHIFT

Enables adjustment of the six primary colors by shifting them toward their adjacent hues.
For instance, cyan can be moved toward green or blue, while red can lean toward yellow or magenta.
Tools designed in two dimensions, such as the Hue vs Hue curve found in many grading software, handle these operations poorly, as can be observed below.

ORIGINAL IMAGE

CHROMATIK

HUE VS HUE

SATURATION

A fundamental operator that has been designed to ensure seamless adjustment of the saturation of the six primary colors, as well as as the skin hue. Combined with hue shifts, it can completely change the palette of an image.

DENSITY

Digital cameras sometimes capture colors that don’t match reality. For example, a reflective object might appear to have a saturation too high relative to its brightness within the scene’s context.
This doesn’t happen with traditional film because the more intense a color is, the more it filters light. As a result, on film, a very saturated color can never look extremely bright.

Notice how the highly saturated colors in the top image (Sony Venice I) appear more “flashy” compared to the same colors in the bottom image, which was shot on 16mm celluloid (250D).

The Brilliance slider in Chromatik addresses this issue. When lowered, it reduces luminance while increasing saturation, which results in deeper and richer colours.

COMPARISON WITH OTHER TOOLS

The ColorSlice tool in DaVinci Resolve would be the default native option for adjusting color brilliance. But the issue with the ColorSlice, or the Hue vs curves, is that these tools operate in only two dimensions, often leading to artifacts — especially noise.

When using ColorSlice to reduce the luminance of red on the actor’s face in the image above, digital noise quickly becomes apparent.
On the other hand, the Brilliance slider in Chromatik enables a smooth luminance reduction without introducing any additional noise
(see below).
This is because brightness adjustments must be processed in three dimensions to preserve image quality.